Just in time for Valentine’s Day I bring you this delightful recipe from POPSUGAR Fitness for today’s BFF: B’s Food Friday! This delicious treat includes surprising ingredients such as tofu, chickpeas and dates! Yup! Tofu and chickpeas! You guys know I love my chickpeas! And there’s little guilt to be had with only 100 calories per serving. Enjoy Angels! love, b
Vegan Chocolate Mousse Cups
INGREDIENTS
Edible chocolate cups:
1 cup plus 2 tablespoons dairy-free dark chocolate chips
Mousse:
1 container silken tofu (1 pound)
1/2 cup chickpeas, rinsed and drained
10 pitted dates
1/4 cup cocoa powder
1/2 teaspoon vanilla extract
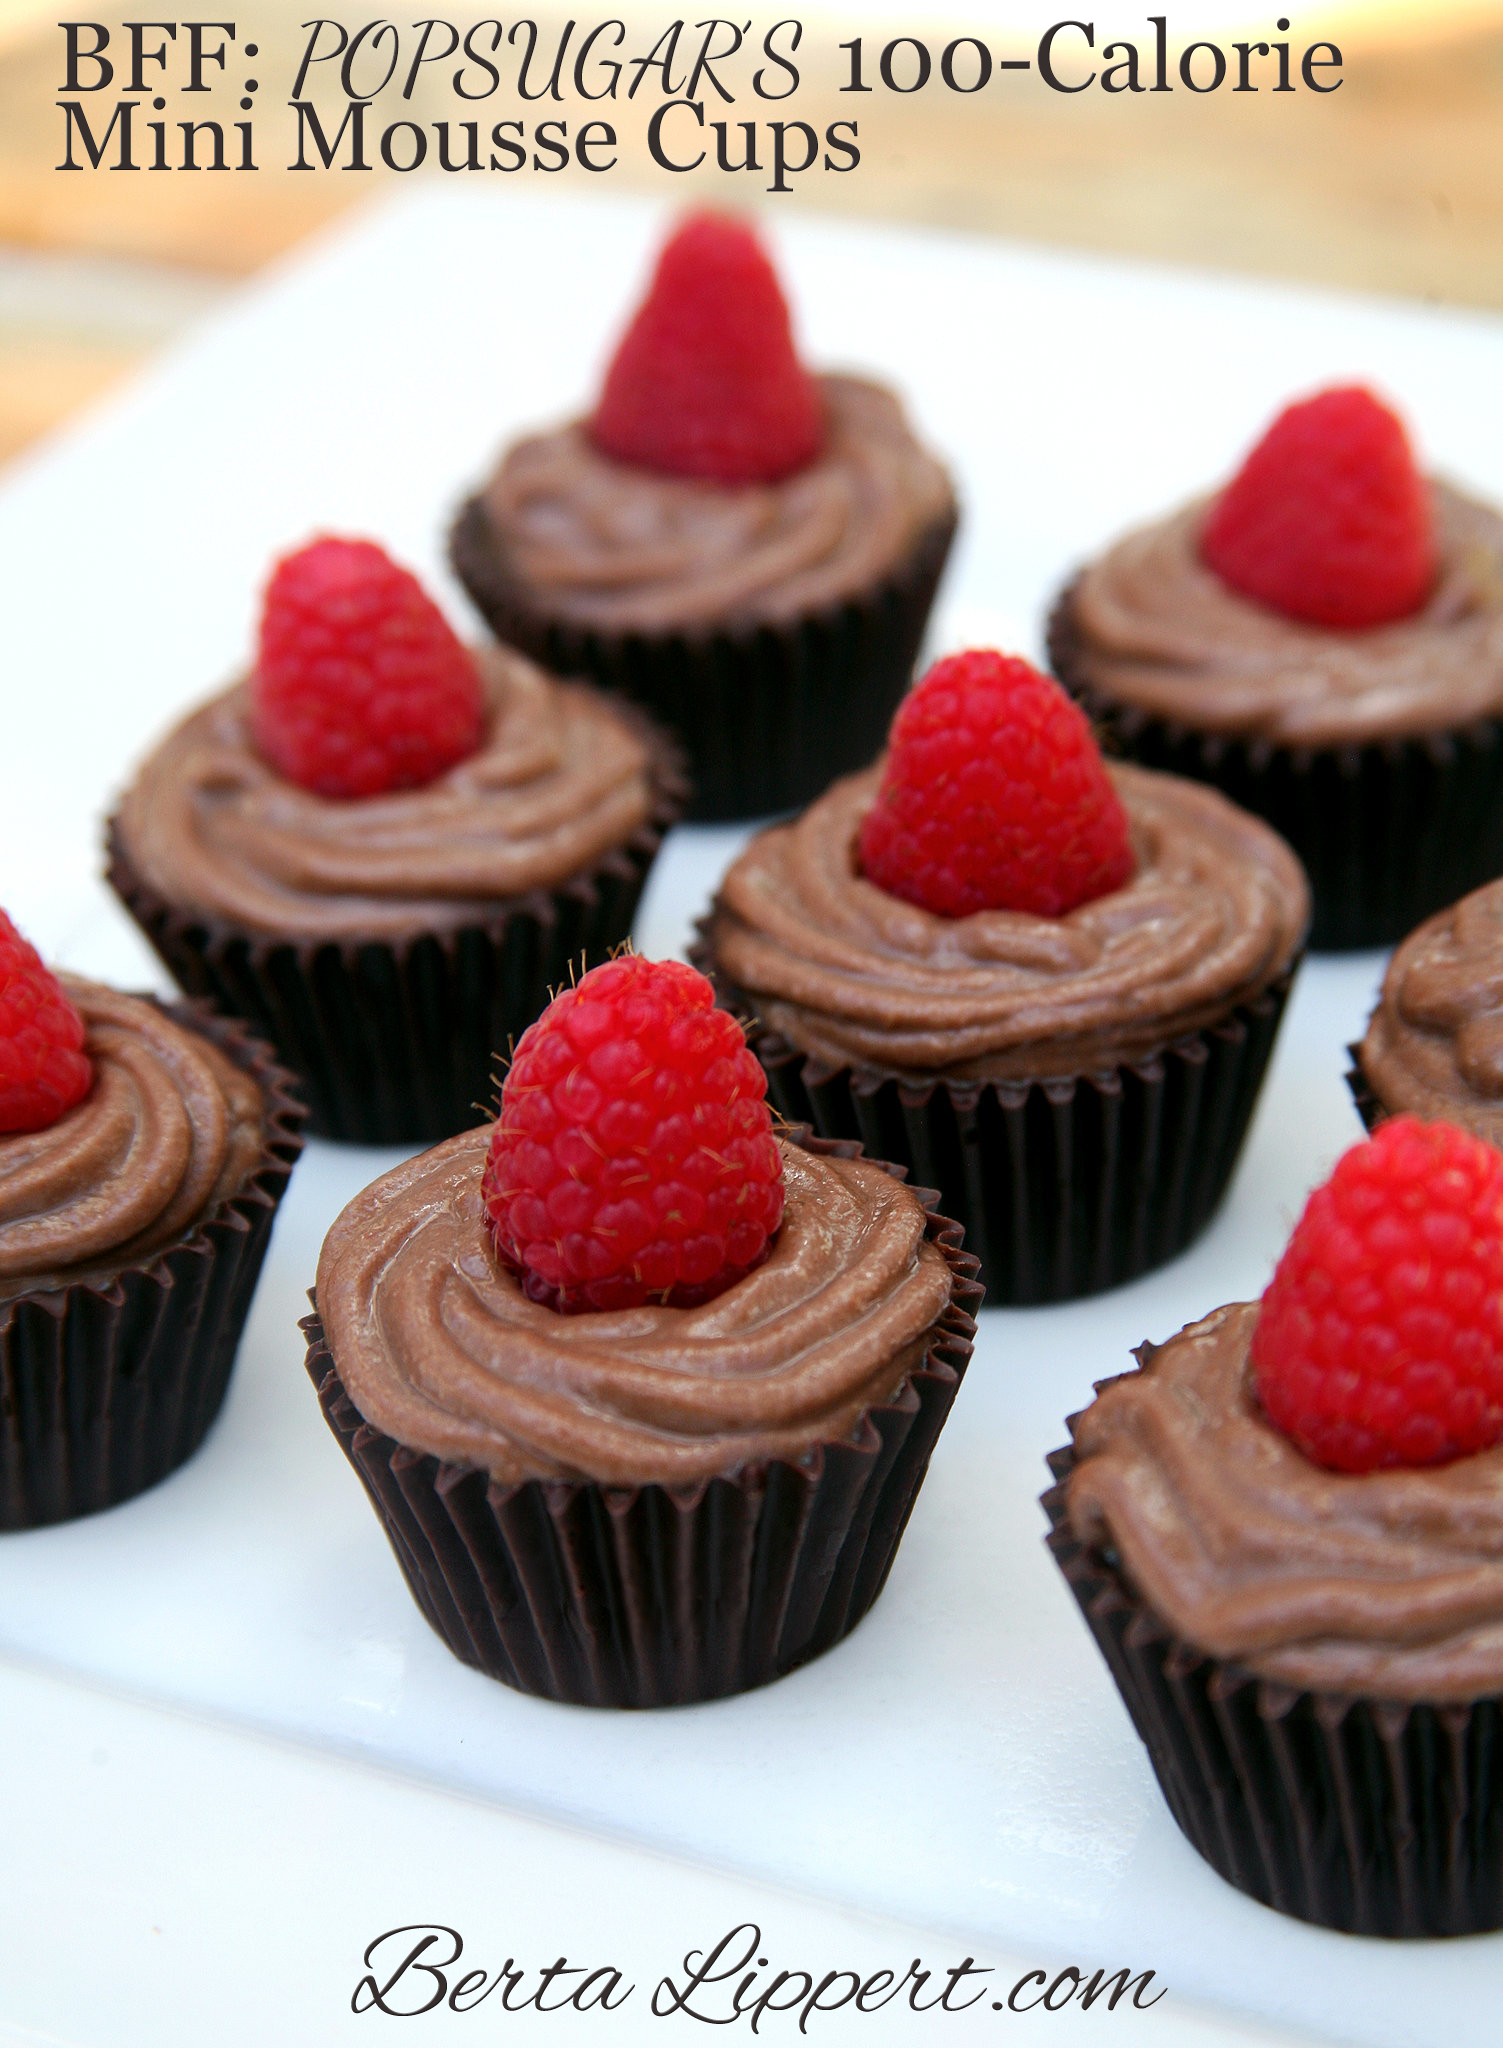
16 raspberries, washed and dried
DIRECTIONS
-
Line 16 mini muffin cups with paper liners.
-
To melt the chocolate, place half a cup plus one tablespoon of chocolate chips in a glass bowl over a pot of simmering water, stirring until smooth.
-
Spoon a small scoop of melted chocolate into each paper liner. Using a pastry brush, carefully brush the melted chocolate over the bottom and up the sides of liners to coat evenly. Place the muffin tin in the freezer for at least 30 minutes to harden.
-
While the first coat of chocolate is setting, make the mousse. Place all the ingredients (except the raspberries) in a food processor and blend until smooth, several minutes. Place mousse in the fridge for at least 30 minutes. If you’re making this recipe ahead of time, it’s OK to leave the mousse in the fridge overnight.
-
Take the muffin tin out of the freezer and repeat, adding a second coat of melted chocolate to the chocolate cups, using the last of the chocolate chips (half a cup plus one tablespoon). Freeze for another 30 minutes.
-
Remove chocolate cups from the freezer. Remove paper liners and place on a chilled plate.
-
Using a pastry bag and icing tip, pipe mousse into the chocolate cups as if you were icing a cupcake. Top with a fresh raspberry and enjoy immediately, or keep in the fridge until ready to serve (up to a day).

Photo & Recipe: Jenny of POPSUGAR Fitness